
In Exercise 1.5, you will see how you can view groups in Azure AD.
If you are using a new setup, chances are you might not see any groups in your environment. This is fine; the purpose of the exercise is to make you understand how you can reach the Groups blade.
EXERCISE 1.5
Viewing Groups in Azure AD
- At this point, you should be familiar with the navigation in the Azure portal and how to reach the Azure Active Directory blade. Right below the Users option that you used earlier, you will be able to see Groups. Clicking Groups will take you to All Groups.
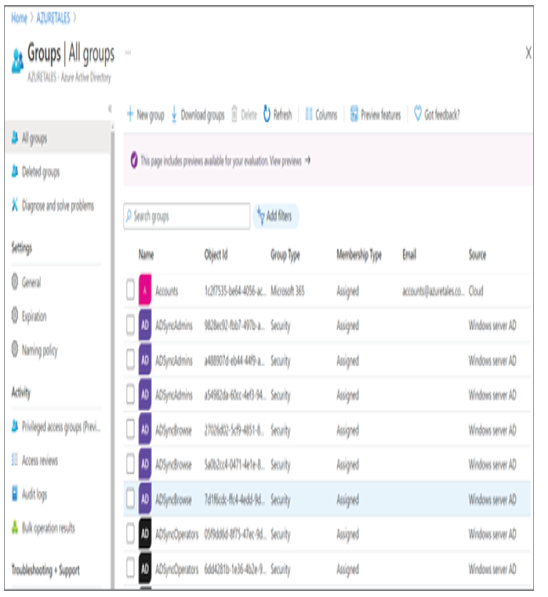
- If you take a close look at the graphic, you can see that this list provides a lot of insights about the listed groups. For example, you can see the group type (Security Group or Microsoft 365 Group), membership type (Dynamic or Assigned), group email (shown only for Microsoft 365 as there will be a shared mailbox), and source (synchronized from Windows Server AD or the cloud). These details are extremely useful in managing the groups and in understanding the properties of a group.
- Clicking any of the groups (you can skip this step if you do not have any groups in your environment) will give you a plethora of details about the group such as how many members are there, list of owners, group membership, device membership, etc.

Now that you know how to navigate to the Groups blade and find a group, let’s move on and see how you can add a new group.
Adding Groups
In this section, we will cover how you can add a new security group and Microsoft 365 group. In addition, you will see how you can work with dynamic rules and direct membership to these groups. Especially in Exercise 1.6, you will create a security group called Avengers and add the users we created in Exercise 1.4 via direct membership.
EXERCISE 1.6
Adding Security Groups to Azure AD
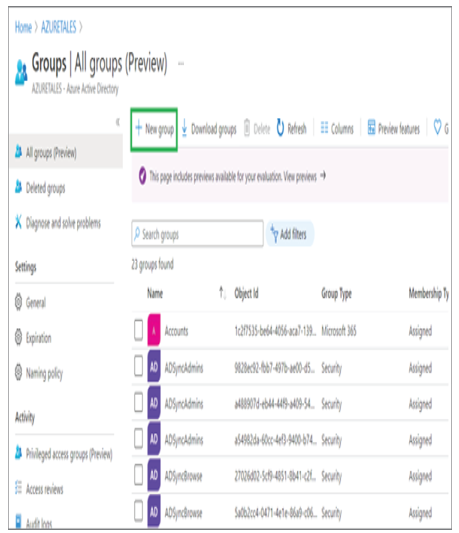
- Navigate to the Groups blade by following the steps mentioned in Exercise 1.5, and you will be able to see New Groups option.
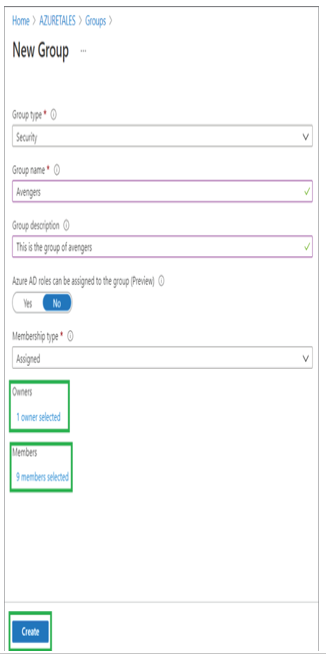
- Since our first task is to create a security group, you can see that we have selected the following options:
a. Group type: Security (as we need to create a security group).
b. Group name: Avengers (as we are going to add the Avengers users here).
c. Group description: This field is optional; if you need to add a description about the group, feel free to add it.
d. Azure AD roles can be assigned to this group: Yes, this setting needs to be enabled if you plan to assign roles to this group from an access management perspective.
e. Membership type: Assigned (as we are going to perform direct assignment).
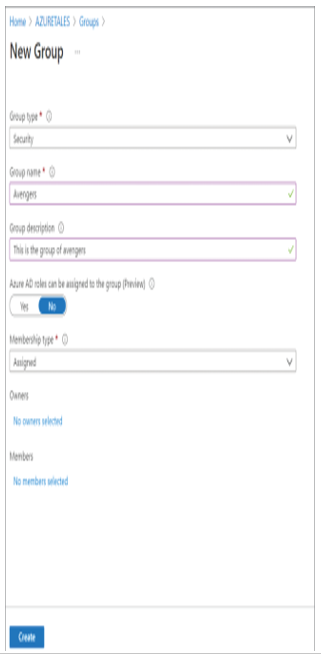
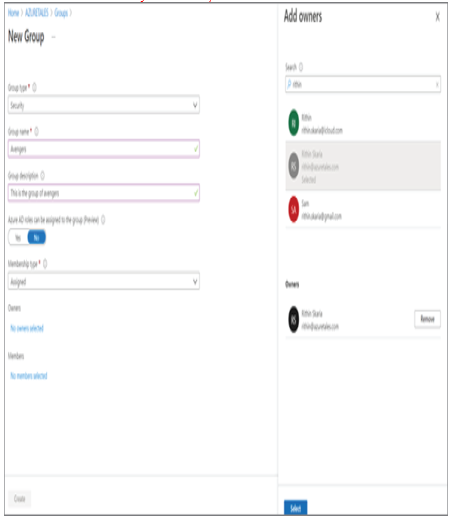
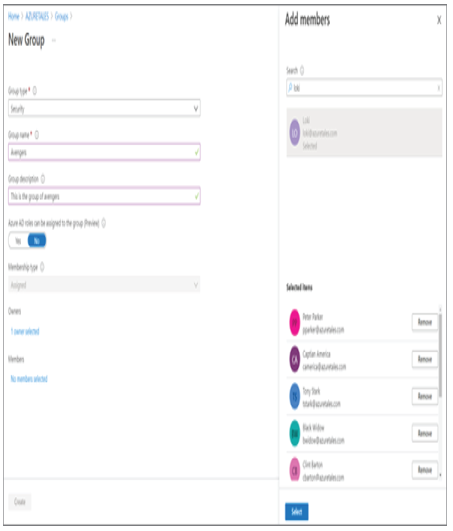
f. Owners: You can select the owners for the group. This set of users will manage the group such as adding or removing users. You can search users, and add once you are done, click Select.
g. Members: This is the set of users who will be part of the group; we will select all users that we need in the group. Once they are selected, click Select to add members to the group.
- The new group window will now show the number of users you selected as owners and members. The next step is to click Create and create the group.
4. Navigate to All Groups and search for Avengers; you will be able to see the new group you created for our Avengers. Clicking the group name will reveal the properties of the group.
If you have followed these steps, then you have successfully completed the exercise to create a security group. Now let’s focus on Microsoft 365 groups and dynamic users in Exercise 1.7.
Security groups can also be created with dynamic memberships supporting both dynamic users and devices; we are going to use Microsoft 365 and dynamic users for demonstration purposes only. You can apply the same logic with security groups and dynamic users, if needed.