
In an enterprise environment, new users are added, updated, or deleted in bulk. Performing these actions one by one for each user is a hectic task, and there is a higher chance of human error. You need to automate these tasks and should be able to perform these tasks in bulk. Azure AD provides bulk operations by which you can create, invite (for guest users), delete, and download users in your directory. These bulk actions are achieved via uploading a CSV file with the details. This file template will be available for download from Azure Portal itself. In the next exercise, you will use a bulk operation to create nine users (all Avengers characters) in a single shot, and once they are visible on the portal, you will perform a bulk delete operation. See Exercise 1.4.
EXERCISE 1.4
Performing Bulk Operations
- Navigate to the All Users blade. If you are not able to recall the steps to reach the All Users blade, please follow steps 1–5 of Exercise 1.1.
- Select Bulk Operations and then select Bulk Create.
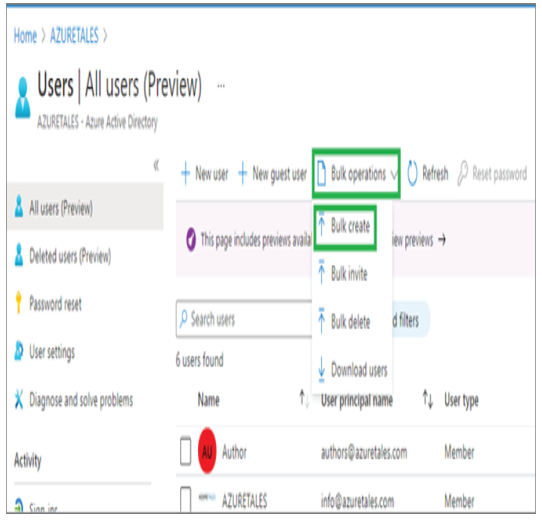
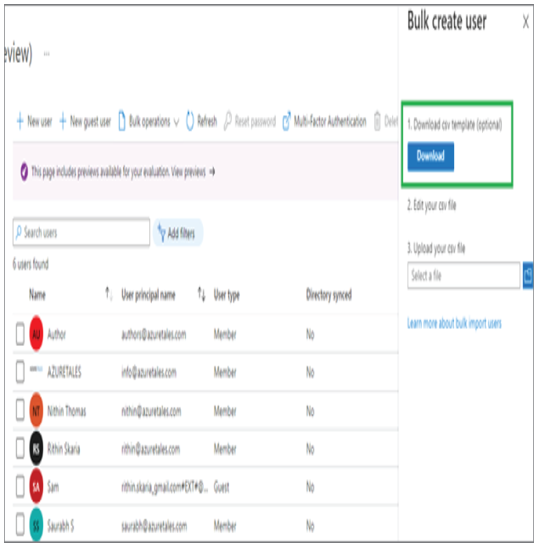
3. Selecting Bulk Create will let you download a CSV template. You need to download the template, fill in the details, and upload it to Azure AD for processing. Azure will prompt you with the steps.
4. Once the file is downloaded, you can open it in Microsoft Excel and fill in the details. The headers will be auto populated; some of them are required, while some are optional. The fields that are required will have a [Required] tag in the header. The required fields are Name, Username, Initial Password, and Block Sign In. Fill in the template, as shown here.
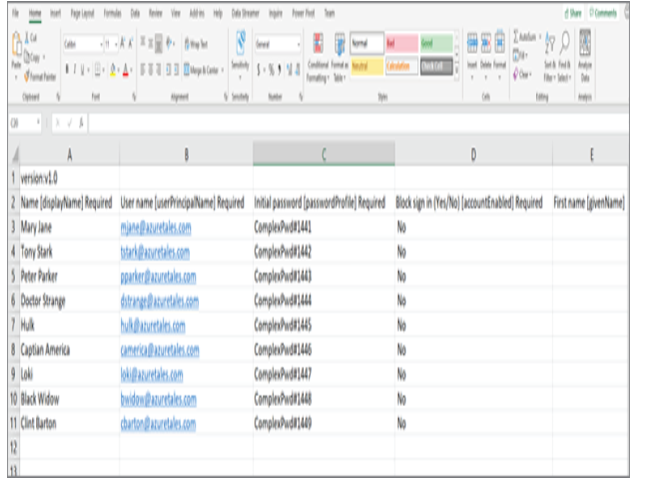
- You can fill the optional details if required; however, it is mandatory to fill in the required fields; otherwise, the validation will fail.
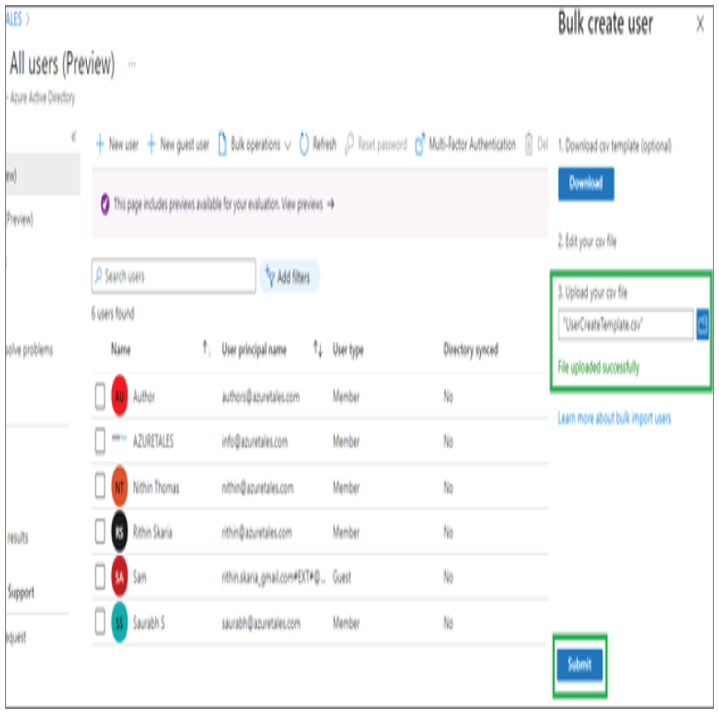
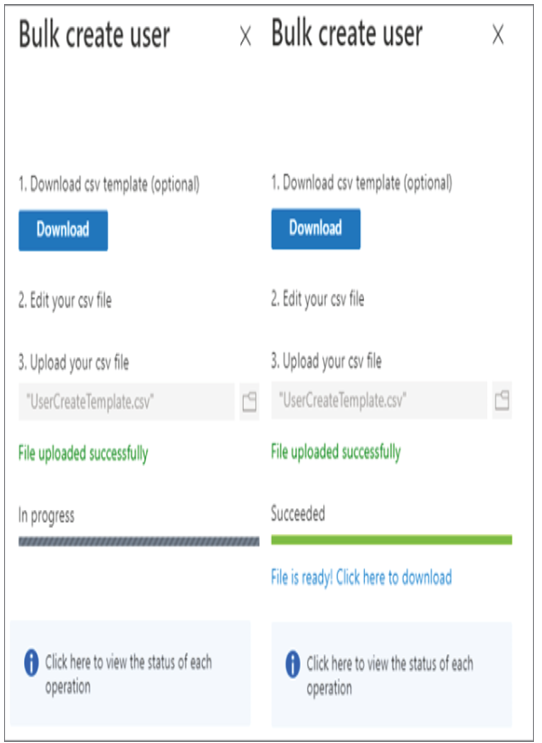
- Let’s upload the file to Azure AD and see if we got it correct. You can use the upload option shown in step 3. If you closed the window after downloading the CSV file, you can click Bulk Operations ➢ Bulk Create and the upload window will be shown again. If the file is uploaded successfully, you will see a message on the screen. Once the file is uploaded, click Submit.
7. As soon as you click Submit, the status will change to “In Progress.” If the format is correct, then you will get a “Succeeded” message.
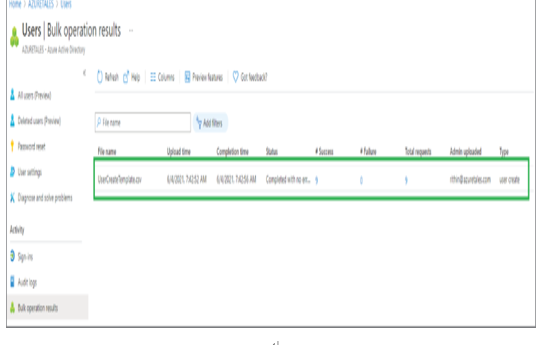
8. You can also verify the status of any bulk operation by navigating to the Bulk Operation Results blade. You will be able to troubleshoot from this blade if you get an error during the bulk operation.
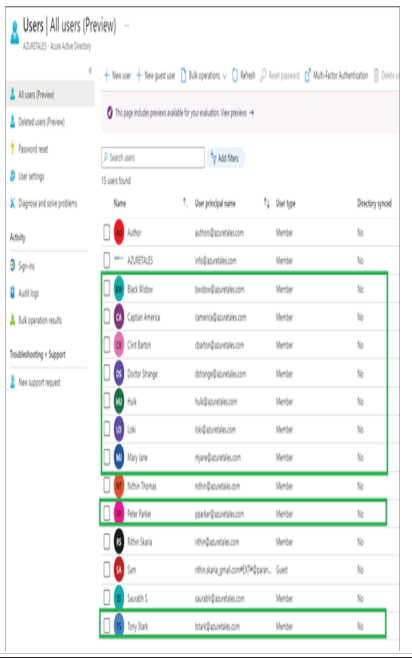
9. Since our bulk operation was successful, let’s confirm if the users are visible in the All Users blade.
Similarly, you can perform bulk delete and bulk invite operations by downloading the corresponding CSV and uploading them back to Azure AD. Speaking about invitations, let’s see how external users can be invited to your tenant for collaboration.
From the Deleted Users blade, you can perform bulk delete and restore operations if required.
Leave a Reply