
Listing Resource Groups from the Azure Portal
- Sign in to the Azure portal.
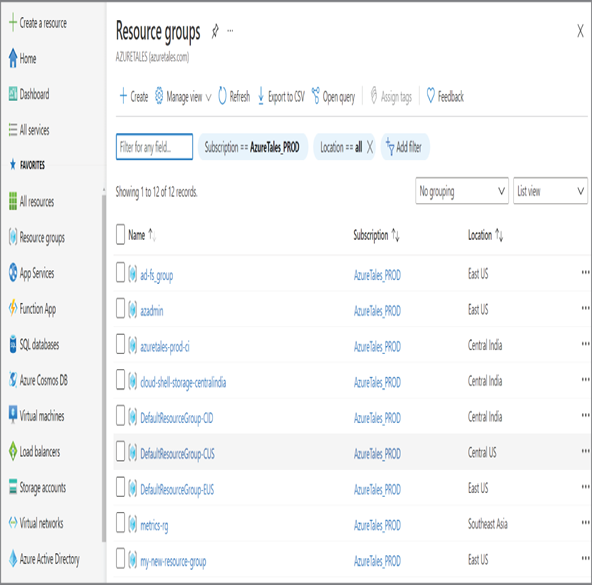
- Select the Resource Groups blade, and you will be able to list all the resource groups in your subscription. You have already seen how to list the resources groups; if you can’t recall, refer to Exercise 2.1, step 2, to see the resource groups (if there are any).
- You can open any resource group by clicking the name of the resource group. If the resource group is a new one, it will be empty. You will see a Create Resources button to add resources to the resource group.
EXERCISE 2.3
Deleting Resource Groups from the Azure Portal
- Sign in to the Azure portal.
- Select the Resource Groups blade, and you will be able to list all resource groups in your subscription.
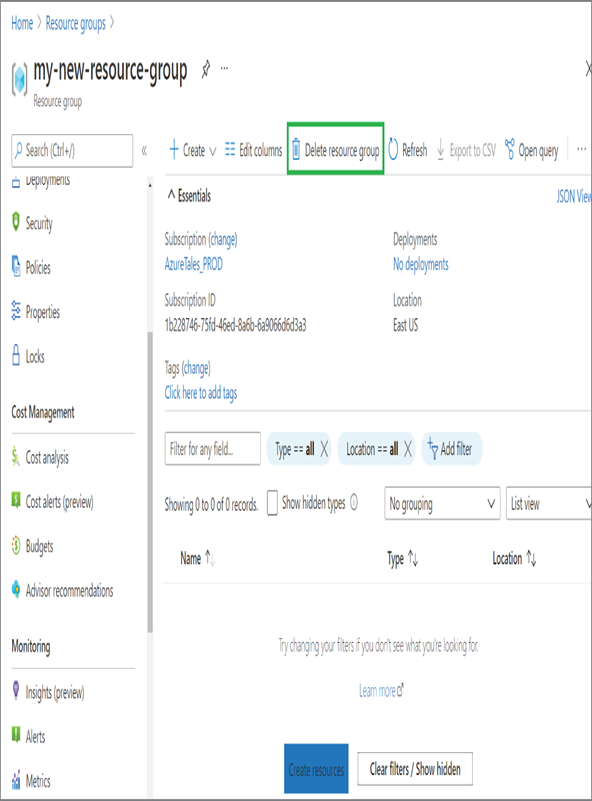
- Open the resource group you would like to delete. Once you are inside the resource group, you will be able to see the Delete Resource Group option that can be used to delete the resource group. You need to enter the name of the resource group to confirm the deletion as this action cannot be undone.
So far, we used the Azure portal to perform the management actions. You can also use Azure PowerShell or the Azure CLI to perform the same tasks. As of now, you can delete only one resource group at a time from the Azure portal. By using scripting, you can perform the management actions in bulk. It’s recommended that you refer to the documentation to learn how to use one of the scripting languages if you prefer to automate your actions in bulk.
In Figure 2.6, you can see that we have created the resource group using the New-AzResourceGroup command along with the location and name parameters, listing resource groups using the Get-AzResourceGroup command, and finally deleting one of the resource groups using the Remove-AzResourceGroup command.
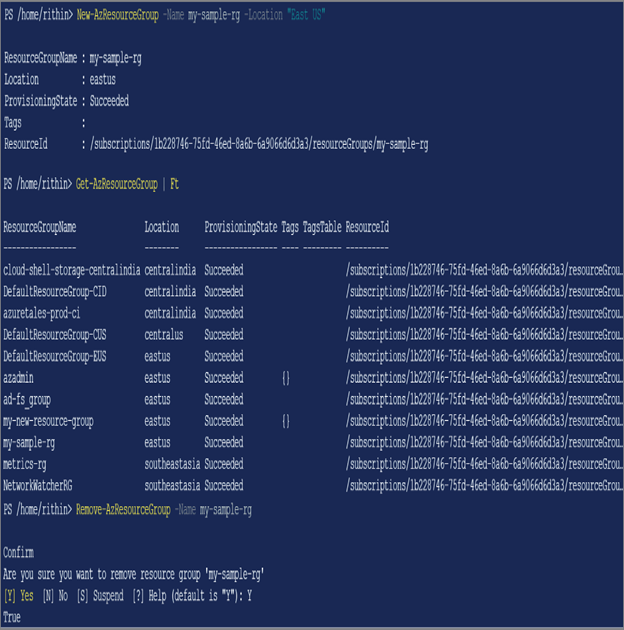
FIGURE 2.6 Managing resource groups using PowerShell
Similarly, you can perform the command using the Azure CLI, as shown in Figure 2.7.
With that, we will move on to the next topic, which is management groups.
Leave a Reply