
Users and groups are the primary objects of every IAM solution, and Azure AD also has a user and group management system, which is the backbone for access management. You have seen what an account is; just to refresh what we discussed; an account is an identity that has data associated to it. In Azure AD, you have user accounts and group accounts for managing users and groups. Let’s get started with user accounts and see the operations that are available for administrators.
User Accounts
As the name suggests, user accounts consist of user identities, which will be used by users to log in to services such as Azure, O365, Dynamics 365, SaaS applications, and other third-party applications that are integrated with Azure AD.
You should create a subscription for testing all labs in this book. You can create a Free Trial subscription. If you are using your personal email address to sign up for the subscription, a new tenant will be automatically provisioned for you. All operations can be performed on that tenant.
Now that you know what a user account is, it is time to see how you can see users in our directory.
Viewing User Accounts
If you are working on a new directory that was set up for testing the exercises in this book, then you won’t have any additional users apart from the account that you used to sign up for the subscription. However, in a production environment, there will be hundreds of users. As an administrator, you will be asked to verify if the account exists in Azure AD or get information about a particular user. Hence, knowing how to view user accounts is particularly important in an IT admin’s daily job. We will follow a step-by-step process to view the users in your directory, as shown in Exercise 1.1.
EXERCISE 1.1
Viewing Users in Your Directory
- Open your browser (Microsoft recommends that you use the latest version of your favorite browser) and navigate to the Azure portal, which is available at https://portal.azure.com.
- A sign-in screen will be presented to you. Sign in using the email address that you used to create the subscription. The data you enter (username and password) will be sent to Azure AD. If the credentials are correct, then you will be logged in.
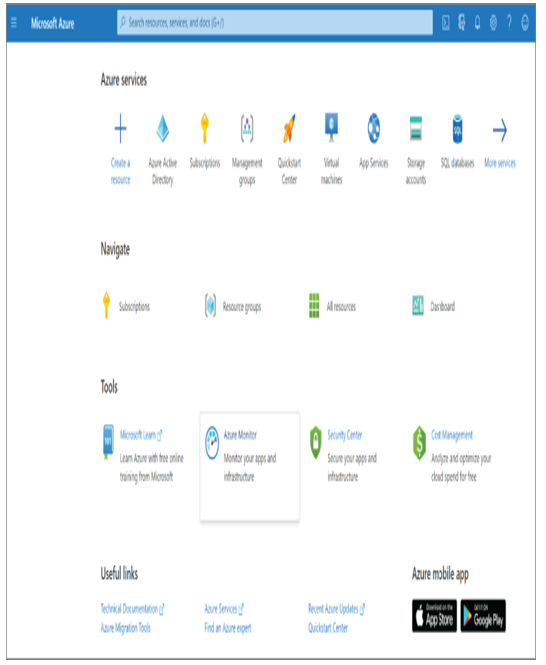
3. Now that you are in the Azure portal, you can click the hamburger icon at the top-left corner and click Azure Active Directory.
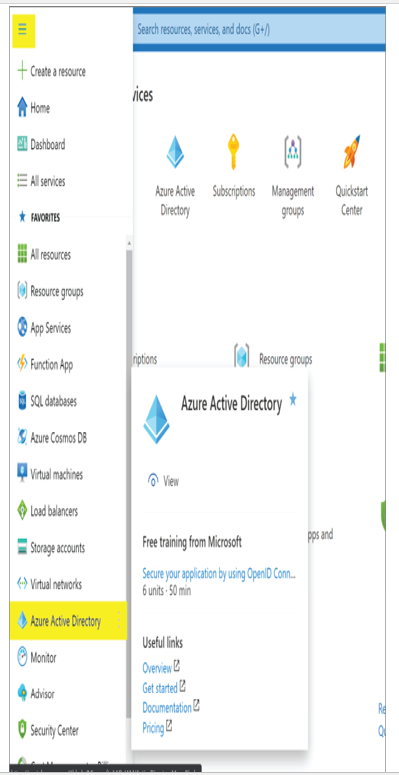
4. Selecting Azure Active Directory will take you to the Overview blade of Azure Active Directory. This blade gives you some idea about certain aspects of your Azure AD such as the tenant ID, tenant name, primary domain associated to your tenant, edition of Azure AD, and number of users, groups, applications, and devices. If you scroll down, you will see more information such as your account, Azure AD connect, secure score, etc. The graphic here shows the overview of the tenant that is used for the demonstration.

If you take a close look at the graphic, you can see at the top the option that will let you create, manage, and delete tenants. These options are quite useful if you are managing a multi-tenant environment. One thing to note here is that deleting a tenant requires you to cancel all active Azure subscriptions that are part of the tenant. You cannot delete a tenant when there is an active Azure subscription associated with that tenant. Since we are working on user management, let’s shift our focus to the Users blade under the Manage section.
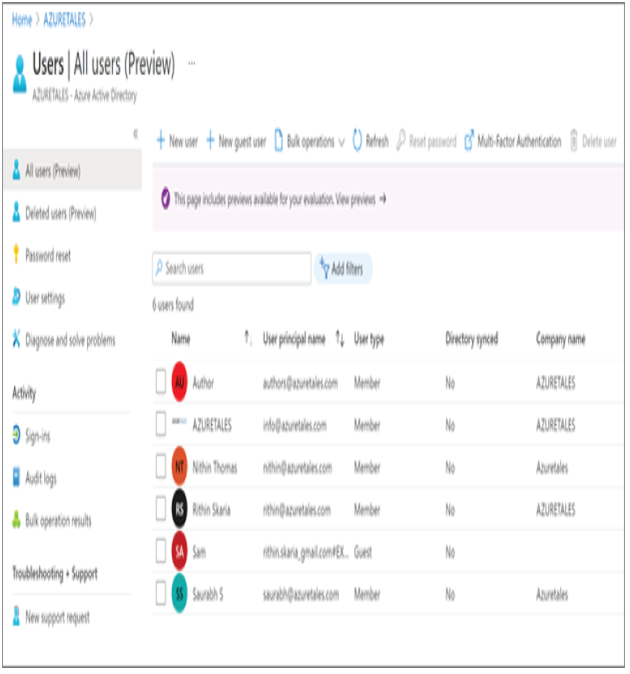
5. Once you click the Users blade, you will be presented with the All Users view. Your view might be different from what is shown here as it is displaying the users in the demo tenant.
6. If you click any user, you will be presented with the details of the user such as name, user principal name, job title, department, manager, etc., along with the creation date and last sign-in date.
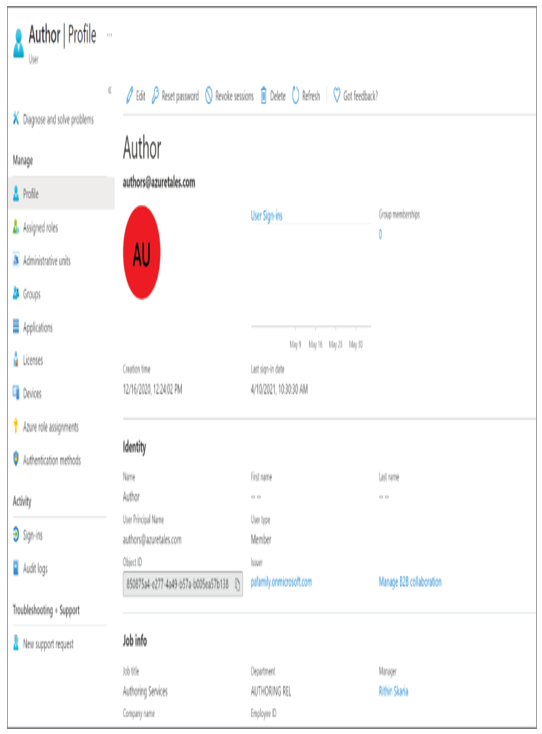
In this section you saw how to view the existing users in the directory and find the details of a user. Now that you know how to find a user in the directory, let’s see how to add a new user to the directory.
Leave a Reply